When we create data tools and products, our aim is for them to be used by the people we’re designing them for. Seems straightforward, right? Well in practice, a few things have to go right to build a product that’s actually useful for people.
Here are three important factors to consider when building something that your customer will genuinely use.
Start by Recognising Key Limitations
If you’re tasked with “automating” a complex data analysis and report generation process, it’s wise to ask yourself whether simplifying one part of the process would be more beneficial than completely replacing everything.
Remember that our stakeholders also have their own stakeholders. Certain aspects might be unchangeable or require extensive buy-in from parties you can’t easily access. Outputs or reports might need to maintain a certain appearance or format, which is non-negotiable. Ensure that whatever you create can produce these required outputs. Cover this during your requirement gathering sessions. Understand your client’s obligations. Not addressing this from the beginning leads to wasted effort and resistance, even if the existing process is slow.
Prioritise User-Friendly Design from the Start
Your objective is to make things easier for your end users, not burden them with learning something new. The user interface (UI) of your data product should reflect this goal. New products should be easy to use, tailored to the user’s data literacy level, and visually appealing. Ask yourself: Does my tool or app need an instructions page or manual? Can I expect my average user to use this tool without extensive guidance?
Building wireframes for data products often becomes an afterthought, but it’s a critical part of the process. Wireframes set expectations and ensure everyone understands what will be delivered. Don’t skip this step! Develop wireframes and, if possible, interactive prototypes (tools like Figma work well). Conduct a UI workshop with your client or end user, observing their interactions with your wireframes and prototypes. Note where they encounter difficulties and inquire about their assumptions while navigating your designs. Do not just email the wireframes and hope for meaningful written feedback!
If your team lacks a designer—or if you are the designer, the product manager, the project manager, and the developer—I highly recommend reviewing Google’s Material Design resources. Using familiar patterns goes a long way towards making your product easy to use. Remember, adopting new software always has a cost for users. They use consumer products every day that adhere to specific guidelines.
Your client is a liar, sometimes… Unintentionally
Asking people whether they’d use a data product is the worst way to get their feedback. Rob Fitzpatrick discusses this in “The Mom Test: How to talk to customers & learn if your business is a good idea when everyone is lying to you.”
Here’s an example: while on holiday in Porto, I took part in a survey from the Porto Tourism board. One question rated the importance of visiting museums and galleries when visiting a new place using a Likert scale. Despite marking “very important,” I didn’t actually visit any on that trip. In fact, I can’t recall the last time I did got to a museum when I was away on holiday. My stated behaviour differed from my actual behaviour. Thinking something was important wasn’t enough to motivate me to actually do it.
Accepting everything clients say at face value is risky. It’s easy to become a feature factory, draining your energy and resources. During the requirement gathering phase, schedule a session with your client or stakeholder to walk through their current process (if automating data extraction or processing). This reveals what works well, what doesn’t, and where the most time is spent. Also, use this time to identify their deal-breakers (as discussed earlier). Action yields information, so establish your requirements based on this information from the start to avoid building something ultimately ineffective. An easy way to combat this is to get to something that they use as part of their processes as soon as possible and iterate from there.
In this blog piece, I’m running through parts two and three together. The reason being is that I completed different parts of the two stages at the same time, so it made sense to just complete the two parts together. So, in this blog, I will go over my POST and GET routes, and the setup and running on a readings script. Let’s dive right in!
Creating the GET and POST routes
With a basic database set up and an app.py file working (see the previous blog post in this series), the next step is to define our GET and POST methods. For the time being, I’m keeping the GET requests pretty basic and so I’ve only set up a ‘getall’ route which would just retrieve all data that is currently stored. I use SQLAlchemy and the query.all() function to return every row of my Particles table and I ask for this in JSON.
@app.route('/airsensor/api/v1/readings/getall', methods=['GET'])
def get_all():
    try:
        particles=Particles.query.all()
        return  jsonify([e.serialize() for e in particles])
    except Exception as e:
	    return(str(e))
For the POST method, I had to use Postman to help me troubleshoot and test to see whether what I had done in my app.py script actually made sense.
This is also why I have a json.dumps() function here – I was manually inputting a row of data through Postman as raw JSON data. But the way request.get_json was bringing in the data was giving me this error when I then tried to plug this into the Particles table further down in my script: ‘Object of type ‘Decimal’ is not JSON serializable’.
To get around this, I used json.dumps(req_data, use_decimal=True) (though I noticed from comments in Stackoverflow that use_decimal=True is default so not sure why it’s inclusion was necessary). Once the script is set up on the raspberry pi, this shouldn’t be necessary here as I will set the dictionary of readings to a JSON format in the requests.post() function.
But this brought about another issue. My data was now a JSON string when I needed it to be a dictionary. I use ast.literal_eval so that I could pull out the necessary keys and values to into the Particles tables on Heroku.
I use SQLAlchemy to parse raw SQL through Python. I do this by first employing the text function which is where I script the insertion of the data pulled in from my post request into the appropriate columns. Two things to notice here. Because of my timestamp column labelling (i.e. use of caps and lower-case letters), SQL requires that I put the timestamp column name in quotation marks so that it reads it as is written as opposed to defaulting to lower case. Perhaps in future, I’ll make my life easier by just using lower case! The other thing to notice is my use of NOW() function which will take the date and time reading at the time of insertion into the table.
Then I use session.execute() function which takes SQL text (output from the text function) and the data that I’d like to parse in. I then commit this and hey presto – we’ve got a post route.
One final thing that needs to be done to allow the app to be accessed externally (and how I was able to troubleshoot by posts through Postman) is to set the host to host = ‘0.0.0.0’. However, to be able to send post requests from my raspberry pi, I had to deploy my API on Heroku. More on this in the next section.
Here’s the full and update app.py script:
from flask import Flask, request, jsonify, render_template
from flask_sqlalchemy import SQLAlchemy
from sqlalchemy.sql import text
import os
import sys
import traceback
import logging
import time
import simplejson as json
import ast
from datetime import datetime
logging.basicConfig(filename='api.log',level=logging.DEBUG)
app = Flask(__name__)
if app.debug is not True:
import logging
from logging.handlers import RotatingFileHandler
file_handler = RotatingFileHandler('python.log', maxBytes=1024 * 1024 * 100, backupCount=20)
file_handler.setLevel(logging.ERROR)
app.logger.setLevel(logging.ERROR)
app.logger.addHandler(file_handler)
app.config.from_object(os.environ['APP_SETTINGS'])
app.config['SQLALCHEMY_TRACK_MODIFICATIONS'] = False
db = SQLAlchemy(app)
from models import Particles
#MAIN HOME PAGE
@app.route("/")
def hello():
return "Air quality sensor API"
#RETURN ALL DATA
@app.route('/airsensor/api/v1/readings/getall', methods=['GET'])
def get_all():
try:
particles=Particles.query.all()
return jsonify([e.serialize() for e in particles])
except Exception as e:
return(str(e))
#POST NEW READINGS
@app.route('/airsensor/api/v1/readings/new', methods=['POST'])
def create_reading():
    status = 0
    logging.info('Started create_reading()')
    req_data = request.get_json(force=True)
    json_data = json.dumps(req_data, use_decimal=True)
    json_data = ast.literal_eval(json_data)

    try:
        session = db.session()
        db_text = text('INSERT INTO particles ("TimeStamp", pm1_0cf1, pm2_5cf1, pm10cf1, pm1_0, pm2_5, pm10, n0_3, n0_5, n1_0, n2_5, n5_0, n10) VALUES(NOW(), :pm1_0cf1, :pm2_5cf1, :pm10cf1, :pm1_0, :pm2_5, :pm10, :n0_3, :n0_5, :n1_0, :n2_5, :n5_0, :n10)')
        db.session.execute(db_text, json_data)
        db.session.commit()

    except Exception as e:
        return(str(e))

    except:
            exc_type, exc_value, exc_traceback = sys.exc_info()
            app.logger.error(traceback.print_exception(exc_type, exc_value, exc_traceback, limit=2))
            return render_template('error.html')
    return jsonify({'status': 'succeeded'}), 201
if __name__ == '__main__':
app.run(host='0.0.0.0')
Running a script to read the data from the air sensor on Raspberry Pi
As mentioned in my first blog, there is a pretty handy PMS7003 Python library (also called Pms7003), which I utilised to get my readings. So, I set up a readings.py script which will take readings from the plugged in air sensor in my raspberry pi, it will convert these readings to a JSON string, then post my Heroku deployed app, it will sleep for 5 minutes, then rinse and repeat. Because I have a hobby-dev plan with Heroku, I am limited to 10,000 rows of data meaning that realistically, I have about a month’s worth of data that I can collect when posting readings every 5 minutes. This means that I won’t be able to continuously collect data without potentially having to either create new tables or export the data. The problem with this will be when I try to do analysis of the readings after a year of collection. I’ll cross that bridge when I get to it though…
So here I will detour briefly to link to all the blogs that I used to deploy my API on Heroku. As mentioned above, in order to successfully send the readings to the Particles table, it was not enough to have host set to host = ‘0.0.0.0’. To deploy my app.py I followed this blog on how to deploy on Heroku. I then used Heroku’s own Dev Centre documentation to configure the DATABASE_URL and APP_SETTINGS as I did in my local virtual environment. This last bit is very important as otherwise, the app will crash.
Back to the readings.py on the rasberry pi…
Before I actually set up a readings.py script on the Rasberry pi, I tested my code in python to make sure that I was getting my prespecified 201 successful post status. I then created the readings.py script by running the following:
sudo nano readings.py
Where I copied and pasted the script that I created in VS Code.
from pms7003 import Pms7003Sensor, PmsSensorException
import time
import sys
import json
import requests

if __name__ == '__main__':

    sensor = Pms7003Sensor('/dev/ttyUSB0')
    starttime = time.time()

    while True:
        try:
            postdata = sensor.read()
            data = json.dumps(postdata)
            res = requests.post('https:ADDRESS-TO-YOUR-APP-ON-HEROKU.com/airsensor/api/v1/readings/new', data=data)
            print(res.status_code)
            print(datetime.utcnow())
            print("I posted the data. Taking a lil nap now...")
            time.sleep(300.0 - ((time.time() - starttime) % 300.0)) #runs every 5 mins
            print("Great nap - I'm awake and working again!")
        except PmsSensorException:
            print('Connection problem')
    sensor.close()
I then ran:
nohup python3 readings.py &
nohup means “no hangup” so it will keep on running even if my terminal session is disconnected, and the ‘&’ will run the command in the background – without the latter I would need the terminal to be running all the time as it would just be a foreground process.
To test whether or not I was getting through what I expected and when I expected it, I called my ‘getall’ route and I also checked the database table through Heroku CLI.
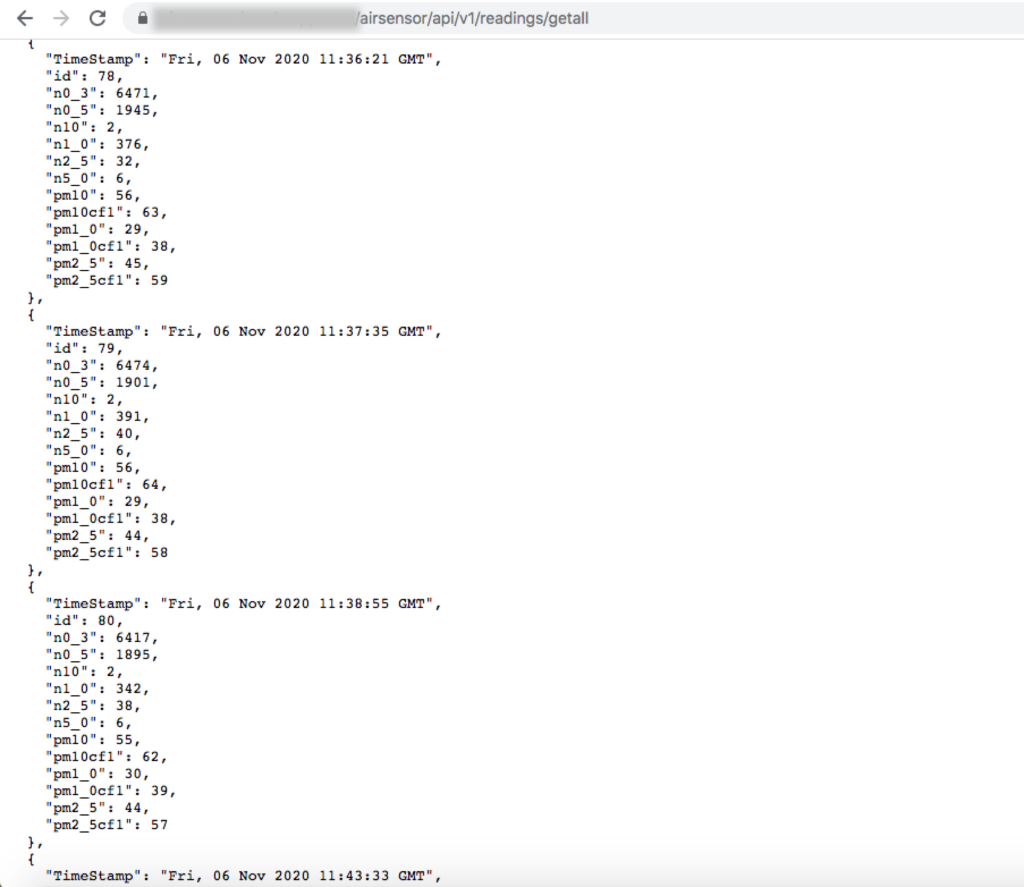
Checking via GET request
Screenshot of data retrieved through ‘getall’ route
Or checking through CLI where you can checkout your tables and table content
heroku pg:psql -a YOUR-APP-NAME
select * from particles;
So in summary…
I’ve set up my POST and GET methods, I’ve deployed my API to Heroku and I have set up a script on the raspberry pi to take sensor readings every 5 minutes and then post them.
Posting Jeremy Morgan’s blog again – whilst I didn’t use it as heavily as I’d thought I would have, it did give a lot of clues around what I should do next and how
For ease, re-linking the blog post on deploying on Heroku again – this one is a goodie because it hand-holds you from Flask app creation through to deployment
Takeaways and next steps:
This stage(s) required a little more independent troubleshooting and problem-solving. I hadn’t used raspberry pi that much previously and my interaction with Postman has historically been more around calling data as opposed to posting data. Because the API will be something that will be called by a dashboard, I will be putting in authentication protocols, but this will come later. But it’s encouraging to see that the sensor is working as I’d hoped it would and that as far as I can tell, the API is working well!
The next stage will be to create a dashboard. I’m very comfortable with RShiny so I decided to try something new work only in Flask. I will cheat just a little bit by taking a Flask Dashboard boilerplate.
The 2020 Data Science Festival kicked off yesterday with a talk by Soledad Galli on feature engineering with Feature-engine, an open-source python library to assist with the streamlining of feature engineering pipelines. The library was created by Train In Data as well as a number of external contributors, and boy does it look dreamy.
Coming from a Stata/R background (shout out to all my Economist colleagues moving into Data Science!), but now getting more accustomed to Python, at times feature engineering in Python feels laborious. Feature-engine seems to resolve this problem and more.
In her talk Soledad mentioned a number of challenges related to feature engineering:
It is time consuming and repetitive: Most code is written manually and there’s no getting around that since libraries like scikit-learn will not work without the right variable formats or appropriate treatment of missing values. Also, bits of code tend to be written and rewritten but not always in the exact same way. Even with really strict version control, it’s sometimes really difficult to guarantee scripting consistency especially when you have a large team or multiple teams.
Keeping your config and param files up to date when you edit or improve the model or features is not very efficient when everything is constructed manually. This ties in with the point made above. If you’re having to manually edit code because you are iteratively improving how your parameters are set up or how the model is set up, you will then need to ensure that you update your configuration files. This isn’t particularly efficient and may have implications on reproducibility…
Reproducibility is king and insufficient consistency makes this very difficult. As Soledad pointed out, the code that you make in the research stage will likely look different to the code that you have in your production pipeline – “more than one way to skin a cat” really rings true here. In the research stage, you’re probably less concerned about speed or efficiency – you write code to give you the intended output as quickly as possible. In the production stage, speed and efficiency of code become really important so code is written to be as optimal as possible and what worked in your research environment (usually Jupyter notebook) might not translate so well in your production environment.
Soledad said that deploying feature-engine in your feature engineering process helps to resolve most of these issues. For one, it allows you to standardise your engineering procedures, so how you deal with say outliers or missing values can be consistent across projects and teams. It also significantly reduces the amount of scripting required on the part of the Data Scientist/Analyst. The reason why feature engineering in Python is such a shock to the system for those coming from Stata is because we are used to black-box functions that are preconstructed and are accepted as the correct procedure for performing a desired transformation. Feature-engine seems to align Python more closely to Stata – ultimately trading off control with engineering procedure standardisation.
In addition to this, Feature-engine allows you to take in and transform dataframes and then spit out an appropriate dataframe suitable for exploration, production or deployment. Combine this with the fact that Feature-engine is compatible with the Scikit-learn pipeline, meaning that you can eliminate the need to reproduce code to be production suitable, and it would seem that Feature-engine could be a real game changer. In fact, Udemy’s Feature Engineering for Machine Learning course even has a few lectures on dealing with certain engineering procedures using Feature-engine!
As the session was on the shorter side, unfortunately we didn’t get a chance to look at how the process of feature engineering looked with feature engine compared to without. I was a little disappointed in this, so for my next blog I’ll be running through a side by side example of feature engineering with feature engine vs without.
In the meantime, have a look at these helpful links on all things Feature-engine and Train In Data:
I would encourage readers of this blog to have a look at the examples and links and let me know what you think of Feature-engine! To catch some of the talks at this year’s Data Science Festival, follow this link.
My partner and I wanted to measure the air quality in our living room. We live on a main road in a busy part of South East London and we have often wondered just how exposed we are to pollutants on a daily basis. This is something that has become even more of a pressing question seeing as with the pandemic we have been spending the majority of our time in the flat. We found a blog on hacker news on how to build your own air sensor.
This blog tells you where to get the necessary parts and how to put them together a PMS7003 air quality sensor at a small price. Whilst this set up uses java, I decided to use Python because a very handy Python package for this exact sensor already exists. Plus, I wanted to focus on Python as much as possible to build up this skill. We also had a Raspberry Pi lying around, which was handy! So, this project is sort of perfect: we want to know how gross our lungs are at any given moment in our flat, we’ve got the parts to build a sensor and it also gives me the opportunity to build APIs, work with live data and data warehousing.
With the sensor ready and whirring the next part is to set up an API that would allow us to send readings from the sensor to our database as well as allow us to read this information back (maybe as a dashboard?). So the next tasks on the agenda are:
Construct a database (going for a PostgreSQL database to allow us to have more freedom later on)
Set-up a basic REST API with Flask (allowing for POST and GET requests) in Python
Create a script to take sensor readings at some frequency (to be decided) which are then posted to the database.
Finally, do something with the data – once enough has been collected, we will do some analysis of air quality in our living room over time. We will probably also create a little live dashboard – because why the hell not!
This blog is part 1 of 4 and will cover Task 1 of this list, and is intended to be like a diary. Links to blogs/tutorials can be found at the end.
I opted for a PostgreSQL database and I decided to use Heroku – mostly because I had used it before meaning that set up would be simple. For any sections where I couldn’t remember or figure out what I had to do, I followed Heroku’s own documentation.
With the database ready, I set about creating my project folder. The blogs and tutorials that I have followed suggest setting up a basic test app.py Flask web app to make sure everything works. This will be edited and tailored later when we’re ready to set up our GET and POST method routes.
from flask import Flask, request
from flask_sqlalchemy import SQLAlchemy
import os

app = Flask(__name__)

app.config.from_object(os.environ['APP_SETTINGS'])
app.config['SQLALCHEMY_TRACK_MODIFICATIONS'] = False
db = SQLAlchemy(app)

from models import Particles

#MAIN HOME PAGE
@app.route("/")
def hello():
    return "Testing Flask app is working"

#PAGE ROUTES - TO BE EDITED FOR OWN PROJECT

if __name__ == '__main__':
    app.run()
This app.py already includes SQLAlchemy and os imports. It’s also already importing a SQLAlchemy model called Particles which is the table that I have created to go into the Heroku PostgreSQL database – more on this shortly.
I then sent up a database configuration script, also in Python, and this is how I’m going to link my app to my Heroku PostgreSQL database (this is my config.py script).
import os
basedir = os.path.abspath(os.path.dirname(__file__))

class Config(object):
    DEBUG = False
    TESTING = False
    CSRF_ENABLED = True
    SECRET_KEY = 'YOUR SECRET KEY GOES HERE'
    SQLALCHEMY_DATABASE_URI = os.environ['DATABASE_URL']


class ProductionConfig(Config):
    DEBUG = False


class StagingConfig(Config):
    DEVELOPMENT = True
    DEBUG = True


class DevelopmentConfig(Config):
    DEVELOPMENT = True
    DEBUG = True


class TestingConfig(Config):
    TESTING = True
In the config object, I include the key database connector details which are found in the Heroku app’s Database credentials tab. I also set the production, staging and development settings objects to development stage and allow for debugging.
To store the air quality data, I needed to create a table in the Heroku database. Whilst it can be done through the Heroku command line interface, I decided to do this in Python. I wanted to gain experience of in working with SQLAlchemy and this felt like a good opportunity! Plus, it meant that I could keep a record of how everything was constructed. In this script, I specify the columns names and the column value datatypes. The PMS7003 gives you 12 readings in total (you can check out the documentation for the sensor here and the PMS7003 Python package coding here), to this I add ID and timestamp columns.
I create the model (my table) called Particles which I will then read into my app.py script. The serialize here is not needed for migration but is useful for returning particle readings object as a JSON response.
Finally, I set the python script that would manage the database migration and then initiate the first migration to send this table to my PostgreSQL database.
from flask_script import Manager
from flask_migrate import Migrate, MigrateCommand

from app import app, db

migrate = Migrate(app, db)
manager = Manager(app)

manager.add_command('db', MigrateCommand)


if __name__ == '__main__':
    manager.run()
To migrate everything, in terminal I execute the following:
python manage.py db init
python manage.py db migrate
python manage.py db upgrade
So, in summary…
Here is a list of a few blogs and tutorials that I have used in this part of the development:
This great blog post by Dushan Kumarasing on creating a web application with Python, Flask, PostgreSQL and deploying on Heroku
Also, this amazing blog by Jeremy Morgan on building APIs in Python. This one will be particularly useful in the next stages as he is working with a weather station connected to a Raspberry Pi which is similar to what I’m doing here
On the whole, this part of the set up was pretty straightforward, especially since I just followed the steps outlined in the above tutorials. I would suggest following Dushan Kumarasing’s blog for this stage, but for the next part (Part 2: Set-up a basic RESTful API with Flask), it will be better to use Jeremy Morgan’s blog a little more given the type of information that will be sent and retrieved from the database and as we will be working with the Raspberry Pi more.