
- Air Quality Sensor Blog
- Building the POST and GET methods for my air quality sensor and harvesting the data from a script on my raspberry pi
In this blog piece, I’m running through parts two and three together. The reason being is that I completed different parts of the two stages at the same time, so it made sense to just complete the two parts together. So, in this blog, I will go over my POST and GET routes, and the setup and running on a readings script. Let’s dive right in!
Creating the GET and POST routes
With a basic database set up and an app.py file working (see the previous blog post in this series), the next step is to define our GET and POST methods. For the time being, I’m keeping the GET requests pretty basic and so I’ve only set up a ‘getall’ route which would just retrieve all data that is currently stored. I use SQLAlchemy and the query.all() function to return every row of my Particles table and I ask for this in JSON.
@app.route('/airsensor/api/v1/readings/getall', methods=['GET'])
def get_all():
    try:
        particles=Particles.query.all()
        return  jsonify([e.serialize() for e in particles])
    except Exception as e:
	    return(str(e))
For the POST method, I had to use Postman to help me troubleshoot and test to see whether what I had done in my app.py script actually made sense.
@app.route('/airsensor/api/v1/readings/new', methods=['POST'])
def create_reading():
    status = 0
    logging.info('Started create_reading()')
    req_data = request.get_json(force=True)
    json_data = json.dumps(req_data, use_decimal=True)
    json_data = ast.literal_eval(json_data)

    try:
        session = db.session()
        db_text = text('INSERT INTO particles ("TimeStamp", pm1_0cf1, pm2_5cf1, pm10cf1, pm1_0, pm2_5, pm10, n0_3, n0_5, n1_0, n2_5, n5_0, n10) VALUES(NOW(), :pm1_0cf1, :pm2_5cf1, :pm10cf1, :pm1_0, :pm2_5, :pm10, :n0_3, :n0_5, :n1_0, :n2_5, :n5_0, :n10)')
        db.session.execute(db_text, json_data)
        db.session.commit()

    except Exception as e:
        return(str(e))

    except:
            exc_type, exc_value, exc_traceback = sys.exc_info()
            app.logger.error(traceback.print_exception(exc_type, exc_value, exc_traceback, limit=2))
            return render_template('error.html')
    return jsonify({'status': 'succeeded'}), 201
This is also why I have a json.dumps() function here – I was manually inputting a row of data through Postman as raw JSON data. But the way request.get_json was bringing in the data was giving me this error when I then tried to plug this into the Particles table further down in my script: ‘Object of type ‘Decimal’ is not JSON serializable’.
To get around this, I used json.dumps(req_data, use_decimal=True) (though I noticed from comments in Stackoverflow that use_decimal=True is default so not sure why it’s inclusion was necessary). Once the script is set up on the raspberry pi, this shouldn’t be necessary here as I will set the dictionary of readings to a JSON format in the requests.post() function.
But this brought about another issue. My data was now a JSON string when I needed it to be a dictionary. I use ast.literal_eval so that I could pull out the necessary keys and values to into the Particles tables on Heroku.
I use SQLAlchemy to parse raw SQL through Python. I do this by first employing the text function which is where I script the insertion of the data pulled in from my post request into the appropriate columns. Two things to notice here. Because of my timestamp column labelling (i.e. use of caps and lower-case letters), SQL requires that I put the timestamp column name in quotation marks so that it reads it as is written as opposed to defaulting to lower case. Perhaps in future, I’ll make my life easier by just using lower case! The other thing to notice is my use of NOW() function which will take the date and time reading at the time of insertion into the table.
Then I use session.execute() function which takes SQL text (output from the text function) and the data that I’d like to parse in. I then commit this and hey presto – we’ve got a post route.
One final thing that needs to be done to allow the app to be accessed externally (and how I was able to troubleshoot by posts through Postman) is to set the host to host = ‘0.0.0.0’. However, to be able to send post requests from my raspberry pi, I had to deploy my API on Heroku. More on this in the next section.
Here’s the full and update app.py script:
from flask import Flask, request, jsonify, render_template
from flask_sqlalchemy import SQLAlchemy
from sqlalchemy.sql import text
import os
import sys
import traceback
import logging
import time
import simplejson as json
import ast
from datetime import datetime
logging.basicConfig(filename='api.log',level=logging.DEBUG)

app = Flask(__name__)

if app.debug is not True:
    import logging
    from logging.handlers import RotatingFileHandler
    file_handler = RotatingFileHandler('python.log', maxBytes=1024 * 1024 * 100, backupCount=20)
    file_handler.setLevel(logging.ERROR)
    app.logger.setLevel(logging.ERROR)
    app.logger.addHandler(file_handler)

app.config.from_object(os.environ['APP_SETTINGS'])
app.config['SQLALCHEMY_TRACK_MODIFICATIONS'] = False
db = SQLAlchemy(app)

from models import Particles

#MAIN HOME PAGE
@app.route("/")
def hello():
    return "Air quality sensor API"

#RETURN ALL DATA
@app.route('/airsensor/api/v1/readings/getall', methods=['GET'])
def get_all():
    try:
        particles=Particles.query.all()
        return  jsonify([e.serialize() for e in particles])
    except Exception as e:
	    return(str(e))

#POST NEW READINGS
@app.route('/airsensor/api/v1/readings/new', methods=['POST'])
def create_reading():
    status = 0
    logging.info('Started create_reading()')
    req_data = request.get_json(force=True)
    json_data = json.dumps(req_data, use_decimal=True)
    json_data = ast.literal_eval(json_data)

    try:
        session = db.session()
        db_text = text('INSERT INTO particles ("TimeStamp", pm1_0cf1, pm2_5cf1, pm10cf1, pm1_0, pm2_5, pm10, n0_3, n0_5, n1_0, n2_5, n5_0, n10) VALUES(NOW(), :pm1_0cf1, :pm2_5cf1, :pm10cf1, :pm1_0, :pm2_5, :pm10, :n0_3, :n0_5, :n1_0, :n2_5, :n5_0, :n10)')
        db.session.execute(db_text, json_data)
        db.session.commit()

    except Exception as e:
        return(str(e))

    except:
            exc_type, exc_value, exc_traceback = sys.exc_info()
            app.logger.error(traceback.print_exception(exc_type, exc_value, exc_traceback, limit=2))
            return render_template('error.html')
    return jsonify({'status': 'succeeded'}), 201

if __name__ == '__main__':
    app.run(host='0.0.0.0')
Running a script to read the data from the air sensor on Raspberry Pi
As mentioned in my first blog, there is a pretty handy PMS7003 Python library (also called Pms7003), which I utilised to get my readings. So, I set up a readings.py script which will take readings from the plugged in air sensor in my raspberry pi, it will convert these readings to a JSON string, then post my Heroku deployed app, it will sleep for 5 minutes, then rinse and repeat. Because I have a hobby-dev plan with Heroku, I am limited to 10,000 rows of data meaning that realistically, I have about a month’s worth of data that I can collect when posting readings every 5 minutes. This means that I won’t be able to continuously collect data without potentially having to either create new tables or export the data. The problem with this will be when I try to do analysis of the readings after a year of collection. I’ll cross that bridge when I get to it though…
So here I will detour briefly to link to all the blogs that I used to deploy my API on Heroku. As mentioned above, in order to successfully send the readings to the Particles table, it was not enough to have host set to host = ‘0.0.0.0’. To deploy my app.py I followed this blog on how to deploy on Heroku. I then used Heroku’s own Dev Centre documentation to configure the DATABASE_URL and APP_SETTINGS as I did in my local virtual environment. This last bit is very important as otherwise, the app will crash.
Back to the readings.py on the rasberry pi…
Before I actually set up a readings.py script on the Rasberry pi, I tested my code in python to make sure that I was getting my prespecified 201 successful post status. I then created the readings.py script by running the following:
sudo nano readings.py
Where I copied and pasted the script that I created in VS Code.
from pms7003 import Pms7003Sensor, PmsSensorException
import time
import sys
import json
import requests

if __name__ == '__main__':

    sensor = Pms7003Sensor('/dev/ttyUSB0')
    starttime = time.time()

    while True:
        try:
            postdata = sensor.read()
            data = json.dumps(postdata)
            res = requests.post('https:ADDRESS-TO-YOUR-APP-ON-HEROKU.com/airsensor/api/v1/readings/new', data=data)
            print(res.status_code)
            print(datetime.utcnow())
            print("I posted the data. Taking a lil nap now...")
            time.sleep(300.0 - ((time.time() - starttime) % 300.0)) #runs every 5 mins
            print("Great nap - I'm awake and working again!")
        except PmsSensorException:
            print('Connection problem')
    sensor.close()
I then ran:
nohup python3 readings.py &
nohup means “no hangup” so it will keep on running even if my terminal session is disconnected, and the ‘&’ will run the command in the background – without the latter I would need the terminal to be running all the time as it would just be a foreground process.
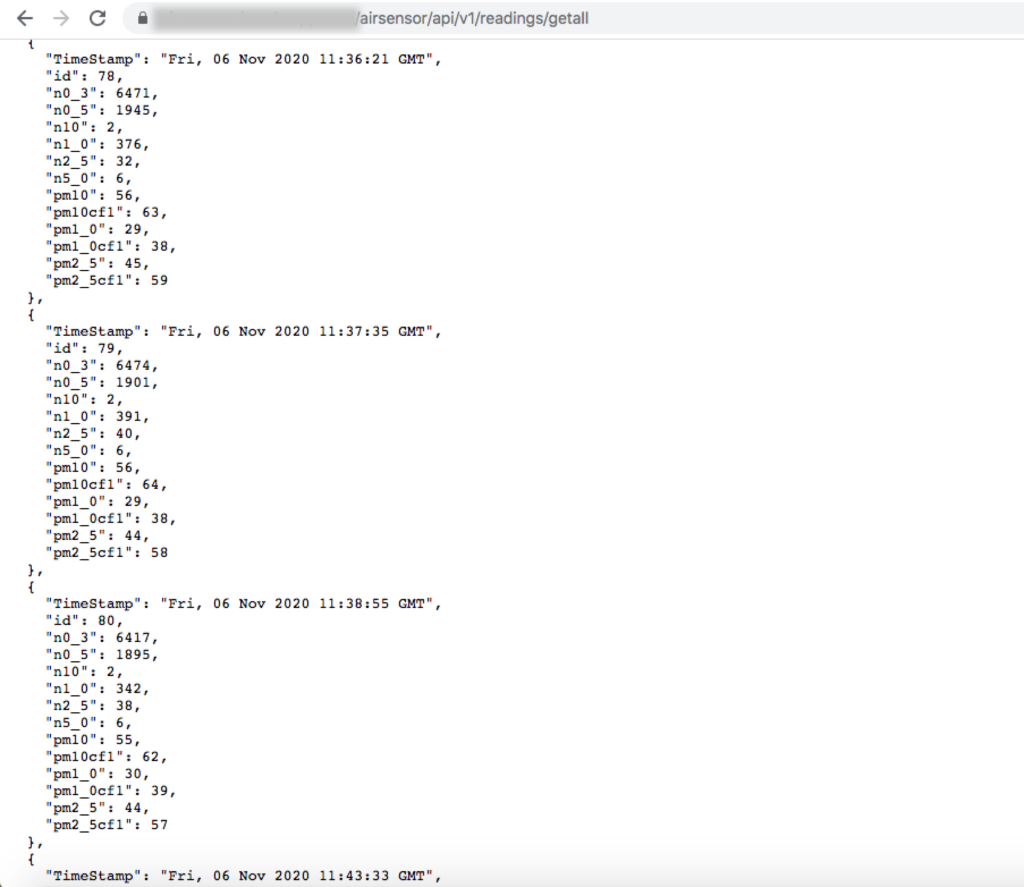
To test whether or not I was getting through what I expected and when I expected it, I called my ‘getall’ route and I also checked the database table through Heroku CLI.
Checking via GET request
Or checking through CLI where you can checkout your tables and table content
heroku pg:psql -a YOUR-APP-NAME
select * from particles;
So in summary…
I’ve set up my POST and GET methods, I’ve deployed my API to Heroku and I have set up a script on the raspberry pi to take sensor readings every 5 minutes and then post them.
Here’s a list of resources that I used this time:
- Postman
- Posting Jeremy Morgan’s blog again – whilst I didn’t use it as heavily as I’d thought I would have, it did give a lot of clues around what I should do next and how
- For ease, re-linking the blog post on deploying on Heroku again – this one is a goodie because it hand-holds you from Flask app creation through to deployment
Takeaways and next steps:
This stage(s) required a little more independent troubleshooting and problem-solving. I hadn’t used raspberry pi that much previously and my interaction with Postman has historically been more around calling data as opposed to posting data. Because the API will be something that will be called by a dashboard, I will be putting in authentication protocols, but this will come later. But it’s encouraging to see that the sensor is working as I’d hoped it would and that as far as I can tell, the API is working well!
The next stage will be to create a dashboard. I’m very comfortable with RShiny so I decided to try something new work only in Flask. I will cheat just a little bit by taking a Flask Dashboard boilerplate.